(If Ben happens across this - This is Tim posting from the Hackerboxes thread).
So I am using an Arduino Uno with a SIM800L. I have the SIM activated ok (so it seems). I am connecting to T-Mobile’s network it looks like. However I can not get SMS messages to go out. The Hologram dashboard does not show any activity at all.
I’ve looked at the library but I’m still a bit confused. I’m trying to talk to SIM800l directly via a terminal. Everything goes well including AT+CIPSTART=“TCP”,“23.253.146.203”,“9999” that results in “CONNECT OK”
Now I couldn’t quite figure out what to send in order to connect to some server. Suppose I want to connect to TCP socket 99 with IP “111.222.333.444” and send “PING” to it. And listen to the reply. What do I do? The sendData routine suggests forming a request starting with lower case “s” and ending in ctrl-z. Are the _deviceId and _deviceKey the “Shared ID” and “Shared Key”? And where to put the actual destination IP and port?
Thanks.
Yeah, still working on documentation right now. The library is still in beta and have been holding off on the documentation because the API might change. Case in point, since you last posted ther is a new version 0.2.0 on github. Go ahead and download it from here: Release beta v 0.2.0 · HologramEducation/hologram-SIMCOM · GitHub
Lets see if we can get you up and running in the meantime.
Sending Data to our Cloud
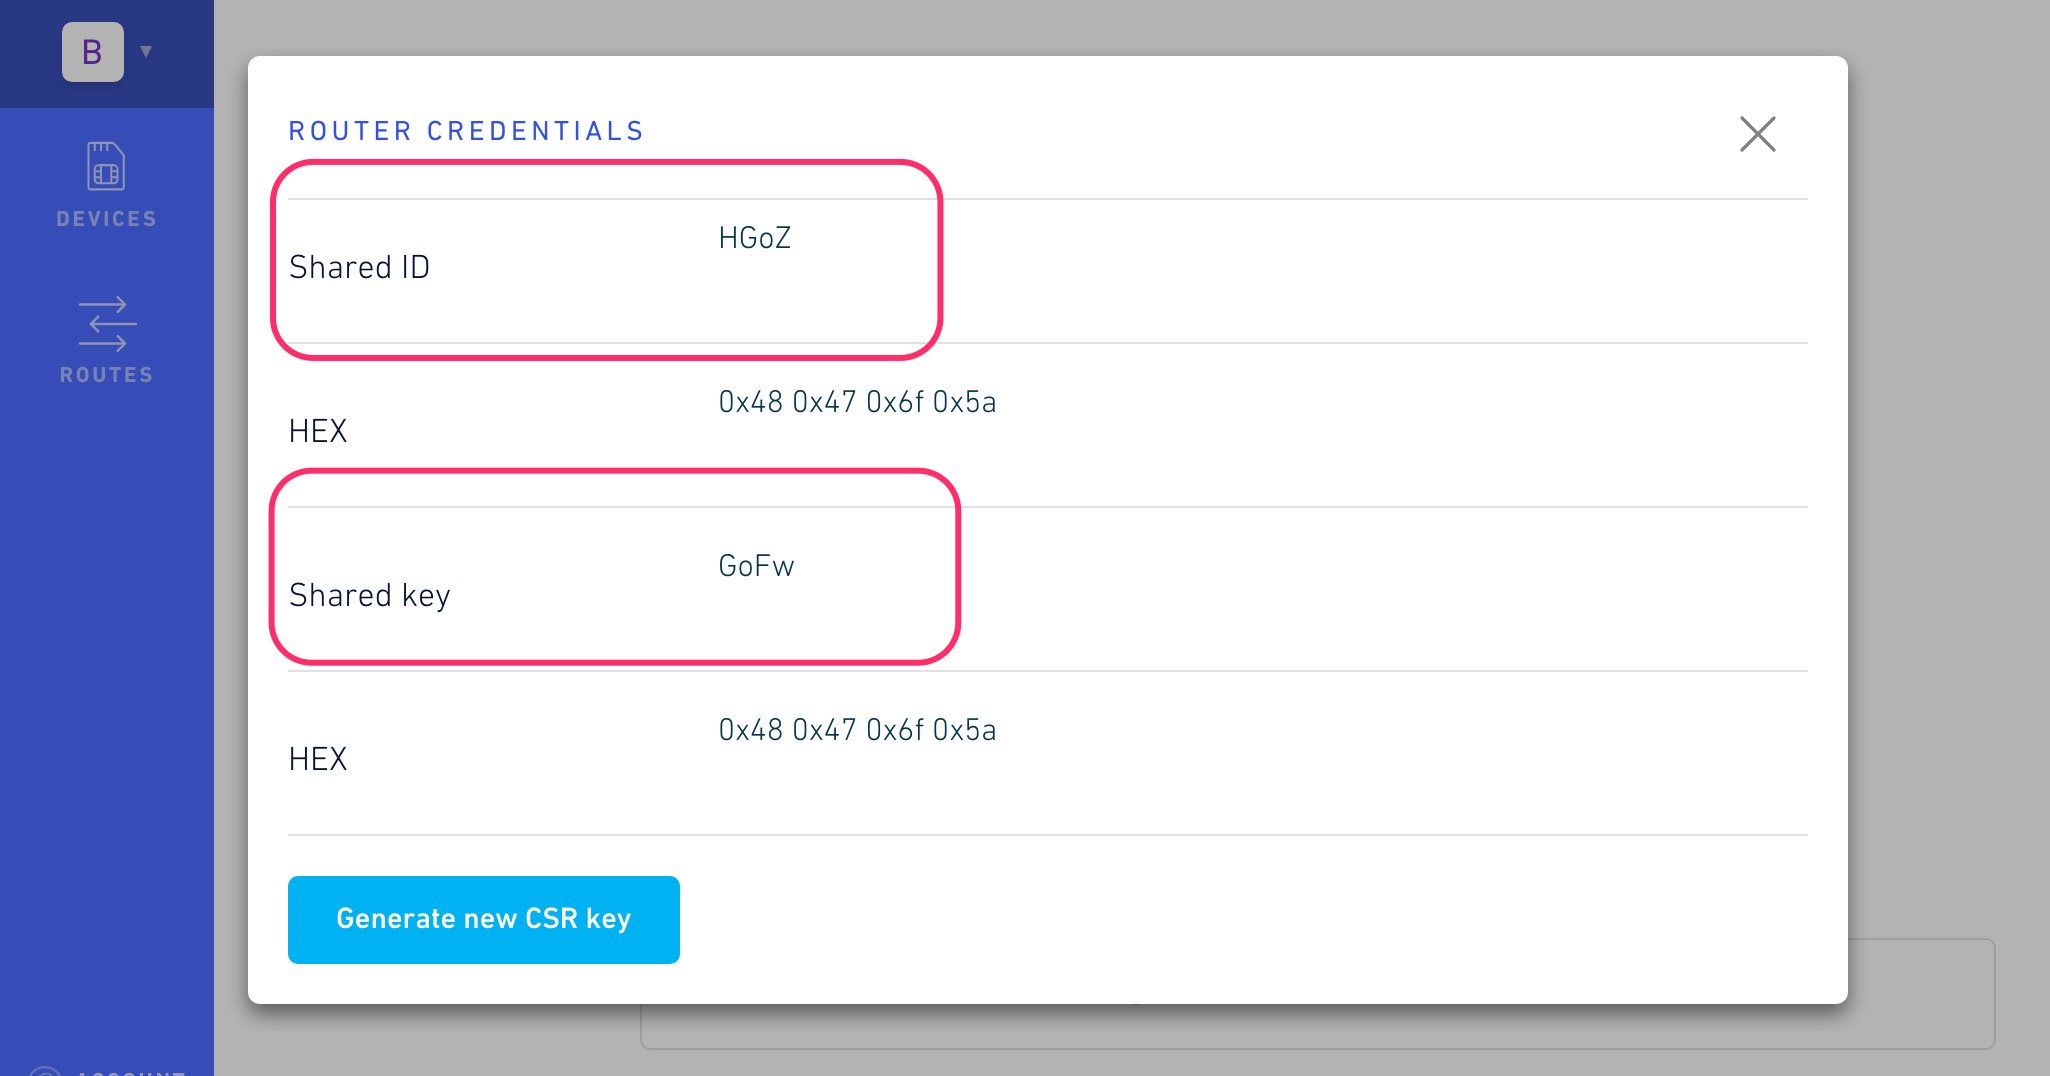
Get your Device_Id and Device_Key from our Dashboard. Go to: Dashboard > Devices > Select your Device > Configuration > Show Router Credentials > Generate New CSR Key.
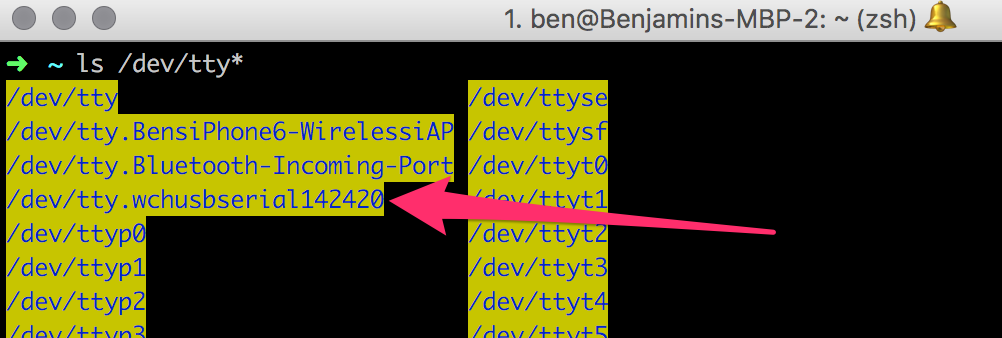
@alexf, also saw you wanted to talk to the SIM800 directly through a serial terminal. Here are the instructions for doing that.
NOTE: This is advanced and tedious. The Arduino IDE Serial Monitor is not capable of executing all the AT commands. This walkthrough assumes you have screen installed for Mac or equivalent. Install screen with sudo apt-get install screen.
Type commands directly into the terminal. Screen allows for you to send CTRL+Z and other keyboard commands not available in the Arduino Serial Monitor.
Here are a few other helpful Screen shortcuts
CTRL+A+D will detach an instance and put you back into normal terminal mode.
$ screen -list will list any active screen instances.
Ben, thank you very much for a reply and a pointer to the updated library. I have a confession to make: I don’t even use Arduino for this project, but since “wiring” is C++ under a different name, it’s a good way to understand the functionality.
I did get the router credential, and BTW there is a bug: the HEX code is correct for the ID, but is a repeat of the ID instead of the Key. Even on your screenshot.
As for the terminal, the only challenge is sending the Control-Z, AKA 0x1a at the end. Not sure about Arduino terminal emulator, but Termite works well under Windows and I use “minicom” under Linux for like 15 years.
My real question was not how to use the tools, but WHAT to send after establishing a connection and sending “AT+CIPSEND”. After posting here I experimented some more and was able to send an SMS to my phone by sending a string used in the sendCloudSMS() routine.
Using the cloud server for sending generic TCPIP data to a 3-d party internet-connected device is still a mystery.
Yes, I can copy the string starting with lowercase “s” and ending in ^z from sendData. But what actual data should be send to say send a request to port 80 of a server at 123.123.123.123? Or should I open a connection directly to 123.123.123.123? If so, what’s the purpose of the “23.253.146.203”,“9999” other than sending cloud SMS? Is it used at all for generic TCPIP?
Thanks.
Just catching up on this thread now. So do I understand you correctly, you do not want to send data to our cloud but instead to another TCP server?
If so then you can ignore the IP and Port I have in my code (“23.253.146.203”,“9999”) since that’s Hologram’s socket server. Also, you can ignore the string manipulations I do since that is just for our cloud as well.
Lastly, there is a little trick with AT+CIPSEND. If you pass the string length you will not need to terminate with Crtl-Z. Instead, a newline and carriage return /n/r would trigger the string to send.
Nice Lib. I’ll suggest to add for future version the ability to call another server than the Hologram Cloud, using AT+HTTPPARA=“URL”
I use this to call our main system using the SIM800. I’ll see if I can mix your lib to get info from Hologram and send data to our server.
Thanks a lot for your job